Introduction
When deploying static or frontend-heavy applications on Vercel, a common requirement is handling form submissions — especially sending emails — without running a traditional backend.
This post documents a clean, production-ready setup using:
- A plain HTML form
- A Vercel Serverless Function
- Resend as the email provider
This approach keeps API keys secure, avoids client-side email hacks, and fits perfectly within Vercel’s hosting model.
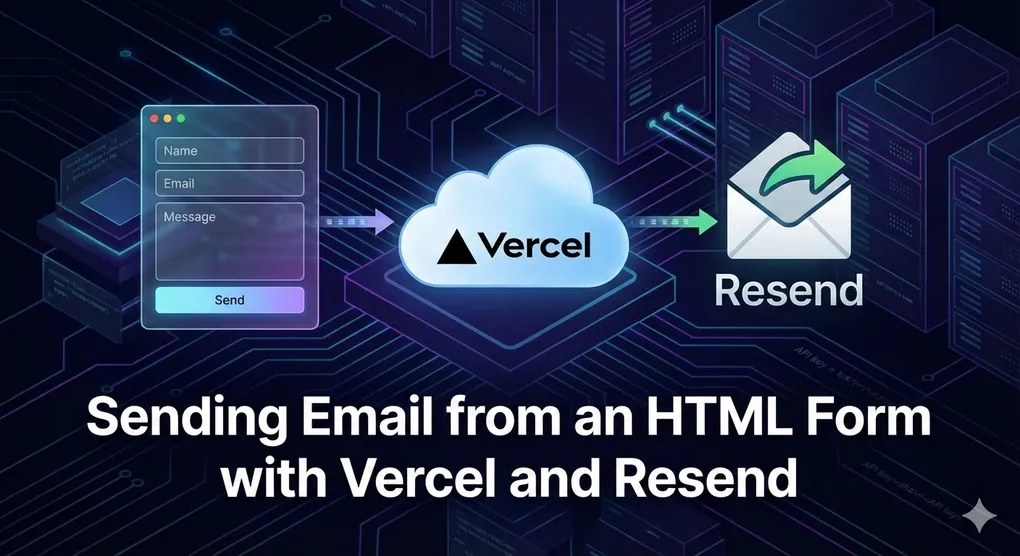
Architecture Overview
HTML Form
   ↓ (POST)
Vercel API Route (/api/contact)
   ↓
Resend Email API
   ↓
Your Inbox
Key principles:
- No secrets in the browser
- No PHP or custom backend
- Works with static HTML, Astro, Next.js, etc.
Prerequisites
- A Vercel project
- Node.js 18+
- A Resend account
Step 1 — Install Resend
npm install resendStep 2 — Create the Serverless Email Endpoint
Create the following file in your project:
api/contact.tsimport { Resend } from "resend";
const resend = new Resend(process.env.RESEND_API_KEY);
export default async function handler(req, res) {
if (req.method !== "POST") {
return res.status(405).json({ error: "Method not allowed" });
}
const { name, email, message } = req.body;
if (!name || !email || !message) {
return res.status(400).json({ error: "Missing required fields" });
}
try {
await resend.emails.send({
from: "Contact Form <onboarding@resend.dev>",
to: ["you@yourdomain.com"],
reply_to: email,
subject: `New contact from ${name}`,
text: `
Name: ${name}
Email: ${email}
${message}
`,
});
return res.status(200).json({ success: true });
} catch (error) {
return res.status(500).json({ error: "Failed to send email" });
}
}Step 3 — Configure Environment Variables
In the Vercel Dashboard:
Project → Settings → Environment VariablesAdd:
RESEND_API_KEY=your_resend_api_keyRedeploy your project after adding the variable.
Step 4 — Plain HTML Form
This works with pure HTML, no framework required.
<form id="contact-form">
  <input name="name" placeholder="Your name" required />
  <input name="email" type="email" placeholder="Your email" required />
  <textarea name="message" placeholder="Message" required></textarea>
  <button type="submit">Send</button>
</form>

<script>
  const form = document.getElementById("contact-form");

  form.addEventListener("submit", async (e) => {
    e.preventDefault();

    const formData = new FormData(form);
    const data = Object.fromEntries(formData.entries());

    const response = await fetch("/api/contact", {
      method: "POST",
      headers: { "Content-Type": "application/json" },
      body: JSON.stringify(data),
    });

    if (response.ok) {
      alert("Message sent successfully");
      form.reset();
    } else {
      alert("Failed to send message");
    }
  });
</script>
Security & Production Tips
- ✅ Never expose API keys in the browser
- ✅ Add a honeypot field for spam protection
- ✅ Add rate limiting if the form is public
- ✅ Consider a custom
fromdomain in Resend
Conclusion
By combining Vercel serverless functions with Resend, you get a simple, secure, and modern way to handle email from HTML forms — without compromising security or developer experience.
If you’re already deploying on Vercel, this is one of the most frictionless solutions available today.